
Generic Head Tracking with SteamVR Setup Guide
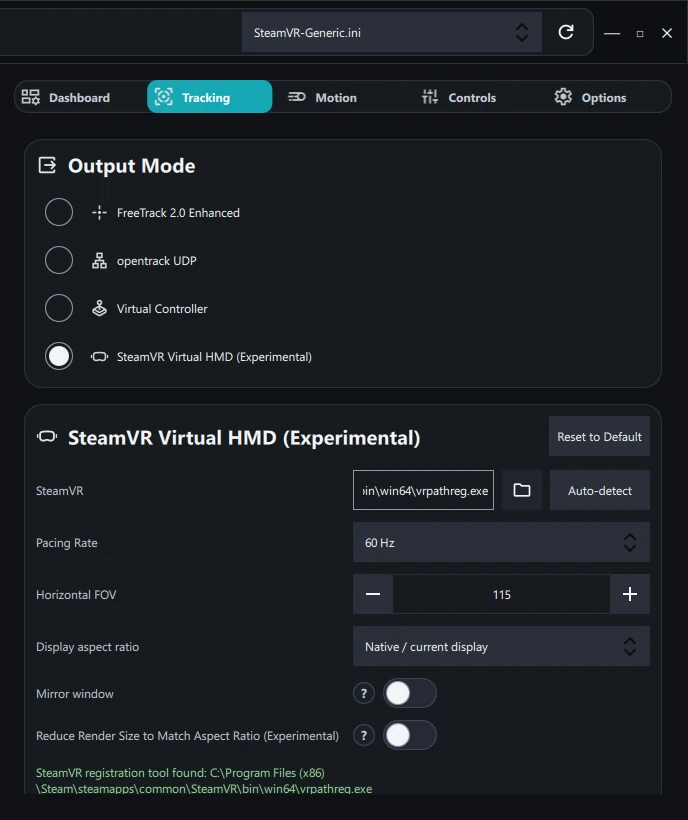
VisApex can provide head tracking to supported VR games through its SteamVR Virtual HMD (Experimental) output.
This allows compatible SteamVR/OpenXR games to receive head-tracking input from VisApex without requiring a physical VR headset.
Note: SteamVR Virtual HMD support is experimental and compatibility may vary between games and systems.
1. Install SteamVR
Install SteamVR through Steam if it is not already installed.
You do not need a physical VR headset. VisApex provides the virtual HMD and head-tracking pose.
2. Create a Game Profile
In VisApex, go to:
Options → Profiles
Create a new profile for the game you want to use.
This is optional, but recommended if you use VisApex with multiple games. It allows you to keep game-specific tracking and SteamVR settings in separate profiles.
3. Select SteamVR Virtual HMD
Go to:
Tracking → Output Mode
Select:
SteamVR Virtual HMD (Experimental)
The SteamVR Virtual HMD settings will appear below.
Pacing Rate
Set Pacing Rate to match the refresh rate or frame rate you intend to use with the game.
For example, if the game is running at 60 Hz, select 60 Hz.
Matching the pacing rate helps provide smooth and consistent head tracking.
Horizontal FOV
For the normal SteamVR setup, Horizontal FOV generally does not affect the game’s spectator or audience window.
You can leave this setting at its default value.
Display aspect ratio
Leave Display aspect ratio at the default setting for normal SteamVR use.
Unlike the Assetto Corsa EVO-specific setup, there is normally no need to configure a letterboxed or custom aspect ratio.
Mirror window
Disable:
Mirror window
For most SteamVR games, you will play using the game’s own desktop, spectator, or audience window rather than the VisApex Virtual Display.
Reduce Render Size to Match Aspect Ratio (Experimental)
Disable:
Reduce Render Size to Match Aspect Ratio (Experimental)
This option is intended for configurations where the VisApex Virtual Display uses a custom aspect ratio and is normally unnecessary for generic SteamVR use.
4. Start VisApex Tracking
Start head tracking in VisApex.
Center the tracking view if necessary. Keep your head still, facing your normal forward position while centering.
5. Start the Game in VR Mode
Start the game using its SteamVR or OpenXR VR mode, as appropriate for that game.
Allow SteamVR and the game to finish starting.
Use the game’s normal desktop, spectator, or audience window for gameplay.
You do not normally need the VisApex Virtual Display for this setup.
6. Center the In-Game View
Many VR games maintain their own VR center independently from VisApex’s tracking center.
If the game provides a Reset View, Recenter VR, or equivalent command, we recommend mapping it to a convenient controller or keyboard button.
If both VisApex and the game need to be recentered:
- Center VisApex first while keeping your head still and facing forward.
- Use the game’s own VR recenter/reset-view function afterward.
7. Check V-Sync and Frame Pacing
For smooth tracking, the game’s displayed frame rate should remain properly synchronized with the selected Pacing Rate.
Normally, the game’s own V-Sync setting should handle this.
If a game does not honor its V-Sync setting or the spectator window exhibits visible tearing or inconsistent frame pacing, you can force V-Sync through your graphics driver.
NVIDIA
Open NVIDIA Control Panel → Manage 3D settings → Program Settings.
Add or select the affected game’s executable and set:
Vertical sync → On
Apply the changes and restart the game.
We recommend creating a per-game profile rather than enabling V-Sync globally.
AMD and Intel
AMD and Intel graphics drivers provide equivalent per-application graphics settings.
Create or select a profile for the affected game and enable the corresponding V-Sync / vertical synchronization option.
The exact name and location of this setting may vary depending on the graphics driver version.
You’re Ready to Play
Once the initial configuration is complete, subsequent sessions are much simpler:
- Start VisApex.
- Select the appropriate game profile if necessary.
- Start VisApex head tracking.
- Launch the game in its SteamVR/OpenXR VR mode.
- Play through the game’s normal desktop, spectator, or audience window.
- Recenter the in-game VR view if necessary.
You normally do not need to repeat the SteamVR Virtual HMD configuration for subsequent sessions.
Important!!!
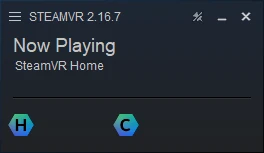
Close SteamVR App after you finish with SteamVR Virtual HMD. It’s cleaner to have it restart with the game.